Marine Toilet Won't Flush: Common Causes and How to Fix It Yourself

Salem Hassan founded Travelcamp RV and brings 30+ years of hands-on RV, marine, and powersports experience to every review.
✎ Reviewed by Salem Hassan — Founder, Travelcamp · 30+ years in RV, marine, and powersports
Why trust us
TopBoatGear articles are researched by the Searchshop Editorial team using manufacturer specs, marine industry sources, and feedback from hands-on boaters. Our standard is saltwater first — if a product is not rated or proven for marine environments, we say so. We may earn a commission on qualifying purchases; it does not change what we recommend. If a product fails in saltwater, the article changes.

A marine toilet that suddenly stops flushing can turn a routine day on the water into a messy problem fast. The good news is that many head issues come down to a handful of common faults: clogs, worn valves, blocked vents, air leaks, or pump problems. In this marine toilet not flushing troubleshooting guide, we researched the most likely causes and organized them into a practical DIY process you can work through safely.
Before starting, close the intake seacock if your setup draws raw water, put on gloves, keep absorbent rags nearby, and make sure the holding tank system is legal and configured correctly for your waters.
What's Going Wrong

When a marine toilet will not flush, the symptom usually shows up in one of a few ways:
- The pump handle moves but no water enters the bowl
- The bowl fills but will not discharge
- The handle is extremely hard to pump
- The handle moves too easily with little resistance
- Waste backs up into the bowl after pumping
- The toilet only fails when the holding tank is near full
This often happens after the boat has sat unused, after someone flushed too much toilet paper, after winter layup, or when rubber parts such as the joker valve have aged and stiffened. It can also appear after maintenance if a hose clamp is loose, a seacock is left closed, or a line is reinstalled incorrectly.
The key is to identify whether the problem is on the intake side, the toilet pump, or the discharge side. Once we separate the system that way, the repair becomes much more manageable.
Root Causes
Closed or Blocked Intake Line
If no flush water reaches the bowl, the intake side is one of the first places to check. A closed seacock, clogged intake strainer, marine growth at the thru-hull, or a kinked hose can stop water flow completely.
Pump Assembly Wear or Air Leaks
Manual marine heads rely on internal seals, O-rings, and valves to create suction and move water and waste. If the pump feels loose, inconsistent, or weak, worn pump parts or an air leak may be preventing proper operation.
Clogged Discharge Hose or Toilet Base
If the bowl fills but does not empty, or pumping gets very hard, there may be a blockage in the toilet base, discharge elbow, or sanitation hose. This is especially common when non-marine toilet paper, wipes, or excess paper have been flushed.
Failed Joker Valve
The joker valve is a small but critical one-way valve on the discharge side. When it warps, hardens, or gets jammed with debris, waste can flow backward, flushing can become difficult, and the bowl may refill after pumping.
Holding Tank Vent or Tank Capacity Problem
A full holding tank or blocked vent line can make the entire system seem clogged. If air cannot escape the tank, discharge slows or stops, and pressure can build in ways that make pumping difficult and unpleasant.
Step-by-Step Fix

Closed or Blocked Intake Line
Tools/parts needed: Screwdriver, pliers, bucket, rags, gloves, small brush, replacement hose clamps if corroded, intake strainer gasket if needed.
- Confirm the seacock position. Make sure the intake seacock is open if the toilet uses raw water. If it was closed, open it and try flushing again.
- Inspect the intake hose. Look for kinks, collapsed sections, or loose clamps that may allow air into the line.
- Check the intake strainer. If your system has one, close the seacock first, open the strainer, and clear weed, shell fragments, or sludge.
- Test water flow safely. With the hose disconnected at an accessible point and the seacock managed carefully, verify whether water can reach the line. Keep a bucket ready.
- Clear marine growth. If the thru-hull appears restricted, use a small brush or suitable pick from inside the fitting only if it is safe and accessible.
- Reassemble and prime the system. Tighten clamps, reopen the seacock, and pump several strokes to restore water flow.
If the bowl now fills normally, the issue was on the intake side.
Pump Assembly Wear or Air Leaks
Tools/parts needed: Manufacturer rebuild kit, silicone-based lubricant approved for marine toilets, screwdriver, adjustable wrench, gloves, rags.
- Assess pump feel. If the handle moves with very little resistance or feels uneven, suspect worn seals or valves.
- Inspect for leaks. Look around the pump body, hose connections, and mounting points for moisture, drips, or salt residue.
- Tighten accessible fasteners. Loose clamps or screws can allow air leaks that reduce suction.
- Disassemble the pump using the manual. We recommend following the toilet manufacturer's exploded diagram closely, since parts orientation matters.
- Replace worn seals and valves. Install the rebuild kit components one by one rather than reusing questionable rubber parts.
- Lubricate correctly. Apply only the lubricant approved for the pump seals. Petroleum-based products can damage rubber.
- Reassemble and test. Pump water through several cycles and confirm both intake and discharge are working smoothly.
If the pump is cracked or heavily corroded, replacing the full pump assembly may be more practical than rebuilding it.
Clogged Discharge Hose or Toilet Base
Tools/parts needed: Gloves, rags, bucket, screwdriver, hose pick, hot water, manufacturer-approved descaling product if needed, replacement sanitation hose if severely blocked or permeated.
- Shut down the system. Close relevant seacocks and, if possible, empty the holding tank before opening discharge-side components.
- Check the toilet base and discharge elbow first. Many clogs collect at the narrowest bends near the toilet rather than deep in the hose run.
- Loosen the discharge hose carefully. Keep a bucket and absorbent pads in place before separating fittings.
- Remove visible blockage manually. Use gloved hands or a hose-safe tool to clear paper buildup or scale accumulation.
- Inspect the hose run. Feel for hard spots, sharp bends, or calcified sections. Sanitation hose can narrow internally over time.
- Flush with hot water if appropriate. For mineral scale, some systems benefit from a manufacturer-approved descaling treatment. Follow product instructions exactly.
- Replace hose if needed. If the hose is heavily calcified, brittle, or odor-permeated, replacement is often the most reliable fix.
- Reassemble with new clamps if old ones are corroded. Then test with clean water before returning the head to normal use.
If pumping becomes easier after clearing the elbow or hose, you found the restriction.
Failed Joker Valve
Tools/parts needed: Replacement joker valve matched to your toilet model, screwdriver or wrench, gloves, rags, gasket if required by the manufacturer.
- Identify the symptoms. A bowl that slowly refills after pumping, poor discharge, or backflow strongly suggests joker valve trouble.
- Access the discharge fitting. Close seacocks and prepare for residual waste in the line.
- Remove the discharge housing. Note the orientation of the old valve before taking it out.
- Inspect the valve. If it is stiff, split, misshapen, or packed with debris, replace it.
- Install the new valve in the correct direction. This is critical; reversed installation will prevent proper one-way flow.
- Reassemble and test. Pump several cycles with clean water and verify that waste water no longer returns to the bowl.
Because joker valves are wear items, replacing them on a maintenance schedule can prevent repeat flushing problems.
Holding Tank Vent or Tank Capacity Problem
Tools/parts needed: Gloves, screwdriver, small brush, water hose for external flushing where appropriate, replacement vent filter or vent line if damaged.
- Check tank level first. If the holding tank is full or nearly full, discharge from the toilet may stop entirely.
- Inspect the vent line. Look for kinks, low spots, insect nests, salt buildup, or clogged vent fittings.
- Clear the vent fitting. Remove debris carefully without damaging the fitting or forcing blockage back into the tank.
- Inspect vent filters if fitted. Replace saturated or clogged filters according to the manufacturer's guidance.
- Test airflow. Once the vent is clear and the tank has capacity, try flushing again.
- Review hose routing. Poorly routed vent lines can trap liquid and reduce airflow, especially after heeling or rough water.
If the toilet flushes normally after tank pump-out or vent cleaning, the toilet itself may have been fine all along.
When to Call a Pro
DIY repairs make sense for many common head problems, but there are clear points where a marine technician is the better choice.
Call a pro if:
- There is a safety hazard. Any sign of leaking seacocks, damaged thru-hulls, or uncontrolled water ingress needs immediate professional attention.
- You smell strong sewage and cannot isolate the source. Hidden hose failure or tank fitting leaks can become a sanitation and health problem.
- The blockage is deep in inaccessible plumbing. If hose runs disappear behind cabinetry or under fixed structures, forcing access can create more damage.
- You need specialty tools. Some vacuum-flush or electric marine toilet systems require model-specific diagnostics, pressure testing, or electrical troubleshooting.
- The toilet is under warranty. Unauthorized disassembly may void coverage. We recommend checking the warranty terms before opening major components.
- Repeated failures keep returning. If you replace a joker valve or clear a clog and the issue comes back quickly, there may be a larger system design or venting problem.
As a rule, if the repair involves structural fittings below the waterline, electrical control modules, or sanitation hose replacement through tight concealed spaces, professional service is usually worth it.
Frequently Asked Questions
Why does my marine toilet pump but not bring in water?
This usually points to the intake side. Check that the intake seacock is open, the strainer is not clogged, the hose is not kinked, and the pump seals are still creating suction.
Why is my marine toilet handle very hard to pump?
A hard pump often means a discharge-side blockage, heavy mineral scale in the hose, a blocked holding tank vent, or a full holding tank. Start by checking tank level and vent condition before opening hoses.
Why does waste come back into the bowl after flushing?
The most common cause is a worn or deformed joker valve. It can also happen if there is a discharge restriction downstream that prevents one-way flow.
Can I use household drain cleaner in a marine toilet?
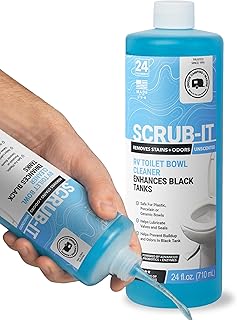
We do not recommend it. Many drain cleaners can damage seals, hoses, and valves, and they may create hazardous splashing during disassembly. Use only products approved for marine sanitation systems.
How often should I replace marine toilet rubber parts?
That depends on usage and environment, but joker valves, seals, and pump service kits are common maintenance items. We recommend checking the manufacturer's schedule and inspecting parts sooner if the boat sits for long periods or the head sees heavy seasonal use.
A non-flushing head is frustrating, but the fix is often straightforward once we isolate whether the problem is intake, pump, discharge, valve, or tank vent related. Work methodically, replace worn rubber parts with model-correct components, and avoid forcing the pump when resistance suddenly increases. In many cases, a careful DIY approach is all it takes to get your marine toilet working properly again.
Get your free Get Our Free Boat Gear Checklist
The essential marine gear list every boater should have before hitting the water.
Recommended Tools & Parts